Steam Smart Pro Carpet Duct & Tile Cleaning 

How to Identify Water-Damaged Kitchen Cabinets: Four Signs

Eric Bullard • 20 February 2023
Water Damage Kitchen Cabinets - Steam Smart Pro

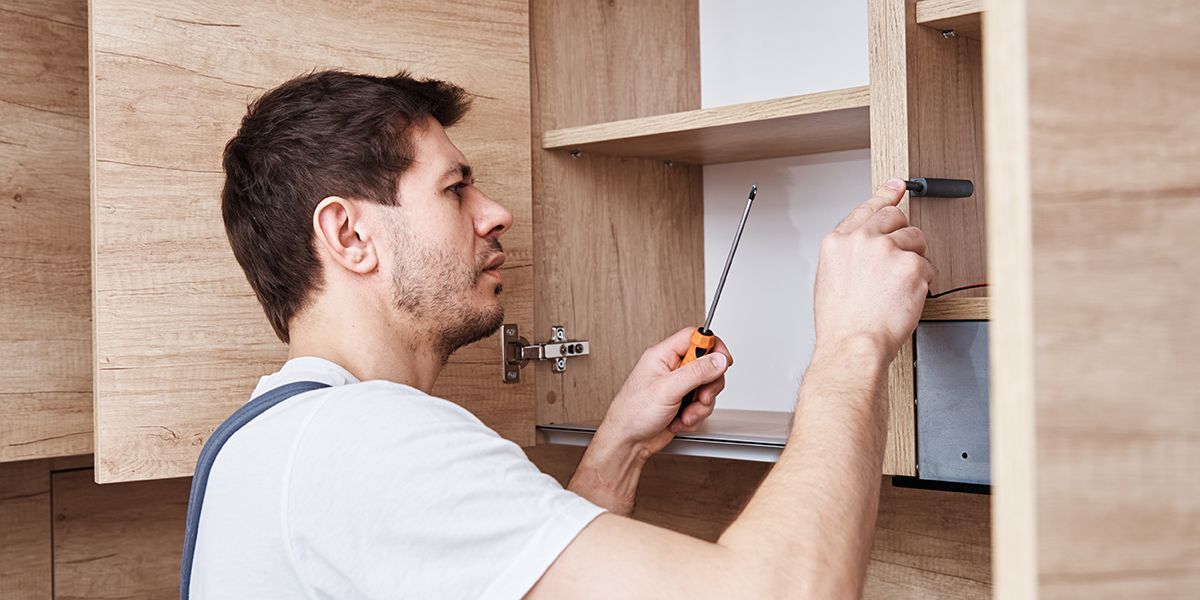
You might not notice water damage until the signs become apparent, especially if you’ve been away from home on a trip. Because of the sink, dishwasher, and fixtures that use water, kitchens tend to easily fall victim to water damage. Water-damaged kitchen cabinets may not seem like a big deal, but the dangers of water-logged building materials and the annoyance of warped doors quickly build up.


If you believe you have water damage in your kitchen, read on to learn what caused the problem, what signs to look for, and what to expect from Tucson’s water damage restoration experts.


Why Are Kitchen Cabinets Susceptible to Water Damage?

Most modern kitchen cabinets consist of natural wood or a material called MDF (medium-density fiberboard). Both of these materials can withstand some splashes of water, but too much moisture in the air or water constantly dripping onto them can cause damage. As the damaged area grows, more of the material soaks up water, creating a domino effect that leaves your whole cabinet water-damaged.


How Do Kitchen Cabinets Become Water-Damaged?

Many kitchen cabinets run from floor to ceiling, often with breaks between them for counter space and plumbing fixtures. Because they settle against your wall and you don’t see their backs or sides as often as their doors and insides, you may miss the initial signs of water damage. 


Waterlogged kitchen cabinets may point to more serious structural damage, with some cases of failing cabinets serving as the first indicator of a leak or moisture problem. Learn what causes water damage so you know what to check for when you suspect water damage in your kitchen.


Leaky Plumbing

Pipes run throughout your home to supply water to your kitchen, laundry room, and bathrooms. If those pipes loosen, crack, or become damaged, they may leak tiny drops of water that cause gradual water damage. Over time, these leaks may reach the tops or backs of your kitchen cabinets and cause water damage.


Window Leaks

Window leaks may come from damaged glass, broken sills, or issues with failing trim. Some leaks leave obvious puddles beneath the window, while others siphon water into your walls. In both cases, window leaks can cause massive water damage without you knowing it, spreading excess moisture into your kitchen, where your cabinets soak it up.


Leaking Ceiling

Ceiling leaks can occur from your roof, windows, or upstairs plumbing. A leaky ceiling could leave pooling water on top of your cabinet that soaks down into the sides, back, and door. The longer a leak goes addressed, the more likely you’ll soon have many more issues on top of water-damaged kitchen cabinets.


Broken Appliances

Broken dishwashers, refrigerators, or kitchen sinks may cause water to leak onto your floor. From the floor, water leaks behind and between kitchen cabinets and other appliances, making it difficult to clean up. The excess moisture then finds its way into kitchen cabinets and causes water damage.


Signs of Water-Damaged Kitchen Cabinets

Now that you understand the potential causes of water damage, learn what signs to look for so you can catch leaks or moisture issues before they cause more damage to your home.


1. Swollen, Bubbled Appearance

Natural wood or MDF kitchen cabinets swell when they come in contact with too much water. As the fibers soak up the moisture, bubbling can occur in areas with large densities of water. These bubbles may indicate permanent damage to wet cabinets, though in some instances, removing excess moisture from the air can make the material flat again.


2. Discolored Streaks or Patches

As water soaks into natural wood, your cabinets may develop light streaks or patches of darker colors. Most manufacturers treat wood cabinets with a varnish or sealant that delays or stops color changes in the wood, indicating that these new patterns most likely came from water damage. 


3. Warping Cabinet Doors

Do your cabinet doors not shut as completely as they used to, leaving gaps or refusing to close all the way? Cabinet doors with water damage may swell, making it more difficult to properly close your cabinets while making plenty of room for pests to get too close to your food.


4. Peeling Paint or Wood

As cabinets swell and bubble up, the paint on them can also swell. Paint will eventually break apart, with parts of it peeling and other parts chipping away. Natural wood may also split in certain areas and peel up, destroying your cabinets and doors.


Restoring water-damaged kitchen cabinets begins with water and moisture removal. While not all cabinets can survive their water damage, sometimes the water removal process can rewind the clock on the damage done. Water damage restoration can help you take back your kitchen and resume using your cabinets safely.


The Four Steps of Water Damage Restoration

Let's go over the typical steps water damage restoration specialists to repair water-damaged kitchen cabinets.


  1. Damage Inspection: Upon arrival, water damage restoration experts will measure your kitchen’s moisture levels and use visual inspections to discover what’s causing your water damage. If they find the leak, they’ll tell you their findings and guide you on what other services you may need to stop the water damage completely.
  2. Standing Water Removal: Using water extraction machinery and pumps, your restoration professionals will get rid of standing water or puddles to reduce the chance of further damage to your home.
  3. Total Moisture Removal: Fans and humidifiers make easy work of drying out your kitchen. Your restoration specialist will open all cabinet doors to ensure that every nook and cranny loses moisture.
  4. Sanitization of Affected Areas: After removing all water and drying the space out, your professional restorers will sanitize and clean any areas the water damage affected.


Get Water Damage Under Control with the Professionals at Steam Smart Pro

Do you have a problem with water-damaged kitchen cabinets or want to know more about water damage prevention tips? Call Steam Smart Pro at (520) 502-7683 to learn more about our water restoration services.


Author Bio:

Eric Bullard

The owner of Steam Smart Pro in Tucson, AZ, brings over 20 years of invaluable experience in the field of carpet, tile, and air duct cleaning. With a strong dedication to quality and a deep understanding of effective cleaning techniques, Eric consistently delivers outstanding results to his satisfied residential and commercial clients.

Our Recent Post

by Eric Bullard 12 July 2024
Discovering an unknown and unpleasant odor in your home is always concerning. One commonly unsuspected culprit of a “smoke”, or “burning” smell comes from a home’s AC (air duct) system. If your air ducts have a lingering smell of smoke, here are six reasons why, and what to do about it. 1) Dirty Air Filter The first thing you should check is your air filter. Having a dirty air filter can not only cause unpleasant odors, but it can also lead to weak performance of your unit, many times even causing it to overheat. This is due to the filter being clogged with dirt and debris, leading to restricted air flow. Solution: Replacement of old air filter. This can easily be done at home with the help of a ladder. Make sure you have the correct measurements of the filter, as they vary in many different sizes. Read your owner’s manual to find out how often you should replace your filter. 2) Failing HVAC system In some cases, a malfunctioning HVAC system can cause a “burning” smell to emit from your air ducts. If there is a problem with any of your HVAC components, it can produce a burning odor that can be mistaken for smoke. There are 2 main faulty components that you should be wary of: Broken Fan Belt - Burning smell accompanied by a squealing noise. Overheated Fan Motor - Burning smell due to overheating. This is a serious issue that should be addressed ASAP. Solution: Keeping up on regular maintenance of your HVAC system. It is important to make sure each of these parts are fixed or replaced by a professional technician to ensure a safe installment, and prevent any further damage to your unit. 3) Electrical Failure A lingering burning smell followed by a popping sound in the same area can be a sign of an electrical failure. The burning smell may be a result of sparks and heat build up. Solution: If you believe it can be an electrical failure, be sure to turn your AC unit off immediately and contact a technician to take a look at it. Electrical failure should only be handled by a professional with proper safety training. 4) Damaged Capacitor The capacitor is responsible for storing electrical energy and helps to start the AC unit's compressor. The capacitor can cause a burning smell if there is regular overheating. Some signs of damage include: AC not starting up Strange noises coming from unit Capacitor is visibly damaged or swollen Solution: Attempting to repair this yourself can be extremely dangerous, so be sure that you contact a professional technician right away! 5) Debris build-up Over time, dirt and debris can accumulate in your ductwork and its components. When your unit is turned on for the first time in a while, it can cause the unit’s fan blades to create a musty odor that can be mistaken as smoke. Solution: Regular air duct cleaning is essential to preventing debris buildup + keeping your home smelling fresh. 6) Smoke Byproducts If you or any previous owners have ever smoked inside the home, it is likely that your air ducts are coated in smoke byproducts such as nicotine and tar. Solution: Hiring a professional to clean your air ducts will help rid of any smoke byproducts + odor particles, as well as any dust and debris that have accumulated over time. There are many health benefits to regular maintenance of your air ducts . Conclusion Overall, if you're experiencing a burning smell coming from your AC unit, it is essential to address the issue promptly. It is best to hire professional technicians with safety training to take a look at any issues with your air ducts in order to prevent further damage to the unit, or any harm to yourself. Regular maintenance of your air duct system has endless benefits, resulting in a long-lasting unit that keeps your home safe and comfortable all year long. In need of professional Air Duct Cleaning in Tucson, AZ? Steam Smart Pro is your solution! Schedule online or call (520)416-4308 for a FREE quote today!
8 June 2024
Tile and grout surfaces can add beauty and functionality to any home, but they require regular maintenance to keep them looking their best. Proper care and maintenance of your tile and grout can help prolong their life and preserve their appearance for years to come. In this blog post, we will share some essential maintenance tips to help you maintain your tiled surfaces in top condition. 1. Regular Cleaning Regular cleaning is key to maintaining the appearance of your tile and grout surfaces. To do this, sweep or vacuum your tiled floors regularly to remove dirt and debris that can scratch and dull the tiles. Use a mild cleaning solution and a soft brush or mop to clean tile and grout surfaces regularly to prevent staining and discoloration. If you happen to have rust on your tile that needs cleaning, click here to find the simple DIY solution! 2. Sealing Seal your tile and grout surfaces to protect them from stains, moisture, and dirt. Sealing creates a protective barrier that helps prevent grime and water from penetrating and seeping into the porous surfaces of tiles and grout. It is recommended by professionals that we reseal our tile and grout surfaces at least once every year to maintain their protective properties. 3. Grout Maintenance Grout is porous and prone to staining and discoloration. To keep your grout looking clean and fresh, regularly clean and scrub grout lines with a grout brush and a mild cleaning solution. Avoid using harsh chemicals or abrasive cleaners that can damage the grout. Consider applying a grout sealer to protect and prolong the life of your grout. 4. Preventative Measures To prevent damage and wear on your tile and grout surfaces, use mats or area rugs in high-traffic areas, such as entryways and hallways. You can also place felt pads under furniture legs to prevent scratching and scuffing your tile floors. Finally, be sure to wipe up any spills and stains immediately as they happen to prevent fluids from seeping into the grout and causing permanent damage that could be avoided! 5. Professional Cleaning While there is no doubt that regular maintenance is essential, professional tile and grout cleaning is always recommended in order to better deep clean and sanitize your tiled surfaces. Professional cleaners have the expertise, equipment, and cleaning solutions to effectively remove deep-seated dirt, stains, and bacteria from tile and grout surfaces. By following these 5 simple maintenance tips, you can prolong the life and appearance of your tile and grout surfaces, as well as ensure its functionality in your home for years to come. Always remember that proper care and maintenance are both essential when it comes to ensuring that your home is always looking its best! Looking for Tile + Grout cleaning in Tucson, Arizona, that will leave you floored? Call Steam Smart Pro at (520) 416-4308 today for a FREE estimate every time!
8 June 2024
Carpet cleaning has always played an overlooked yet crucial role when it comes to maintaining a tidy home. However, there are many misconceptions and myths surrounding carpet cleaning that can lead to confusion and the spread of misinformation. It’s important that we debunk some of the most common misconceptions about carpet cleaning to help you make informed decisions when it comes to caring for your home’s carpets! Misconception #1: Vacuuming is enough to keep carpets clean Regular vacuuming is undeniably an important step in removing surface dirt and debris from carpets, but it is not quite enough to eliminate deep-seated dirt, allergens, and bacteria. Professional carpet cleaning is necessary to thoroughly clean and sanitize carpets, ensuring a healthy indoor environment for you and your family. Misconception #2: Carpet cleaning can damage carpets It is believed by some that carpet cleaning can damage carpets, cause them to shrink or make them lose their shape. However, when done correctly by trained professionals using the correct methods + equipment, carpet cleaning can actually extend the life of your carpets, with the plus of keeping them looking fresh and vibrant. Misconception #3: DIY carpet cleaning is just as effective as professional cleaning While DIY carpet cleaning methods such as using rental carpet cleaning machines or homemade cleaning solutions may seem cost-effective, they often do not provide the same level of deep cleaning and sanitization as professional carpet cleaning. Professional carpet cleaners have the equipment, and specialized cleaning solutions and the specialized expertise to effectively remove tough stains, odors, and allergens from carpets. Misconception #4: Carpets should only be cleaned when they appear dirty Many homeowners wait until their carpets look visibly dirty before scheduling a professional cleaning. However, regular carpet cleaning is essential for maintaining a healthy indoor environment, even if your carpets appear clean. Over time, carpets can accumulate dust, allergens, bacteria, and other contaminants that are often not visible to the naked eye, making regular cleaning crucial for your health and well-being. Misconception #5: All carpet cleaning methods are the same There are various carpet cleaning methods available, including steam cleaning, dry cleaning, and hot water extraction. Each method has its own advantages and is suitable for different types of carpets and cleaning needs. It is important to choose a reputable company that uses the right cleaning method for your specific carpets to ensure optimal results. Since reading this article, you now know that it is super important to separate fact from fiction when it comes to home maintenance. There are many health benefits that come from carpet cleaning, as well as many other overlooked aspects of your home. By debunking these common misconceptions today, we hope that you can now make informed decisions when it comes to cleaning and maintaining your home’s carpets! Need professional carpet cleaning in Tucson, Arizona? Call Steam Smart Pro at (520) 416-4308 today to book a FREE quote!
SEE MORE

Request A Free Estimate

Free Estimate Form

Share by: